Feedback survey settings
After you have selected that you want to create a feedback survey, you will get three options.
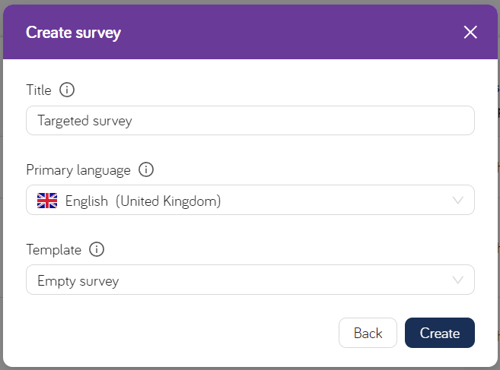
Title
The title of the survey is only for internal use, and will not be visible in the survey. Although you can keep the default “Feedback survey”, it’s easier for you and your colleague if you give the survey a descriptive name, such as “Feedback contact information”. However, you can also change the name later on.
Primary language
This is the language of the survey, and you are able to add more languages later on.
Template
We offer different templates for feedback surveys too, based on focus areas. Use one of our templates or start with an empty survey.
Once you have saved you choices for name, language, and template, we move on to the survey content and publication information. For feedback surveys, there are 6 steps.
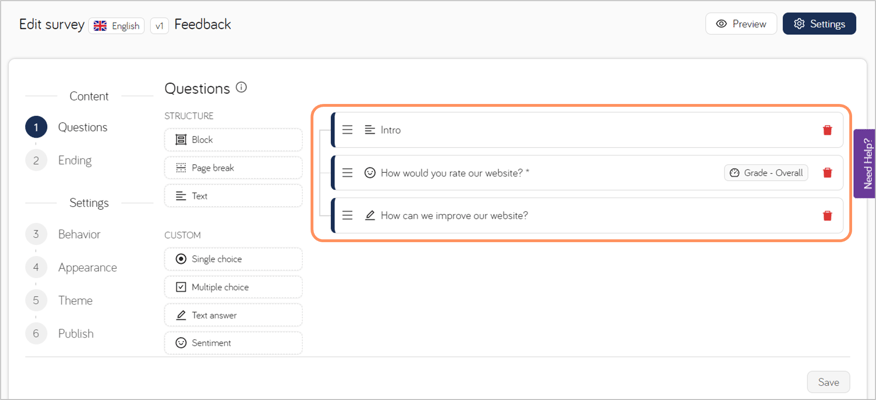
Step 1: Questions
If you use one of our templates, you will find that there are already questions added to your survey. These questions can be altered or deleted, and you can of course add new questions.
We have some options for structuring your survey, but as feedback surveys should be kept short, they probably aren’t relevant for you at this point. However, if you want to read more about blocks, page breaks and text for structuring your survey, we have an article about that.
There is some information you can get about the questions in your survey from this view. You can see what type of question they are from the icons used (you can read more about question types here)…
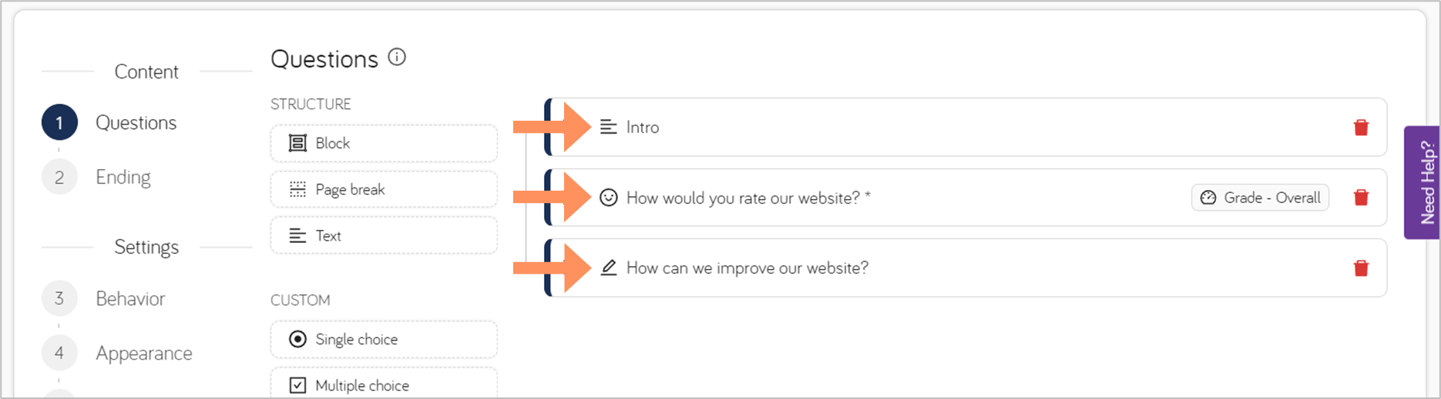
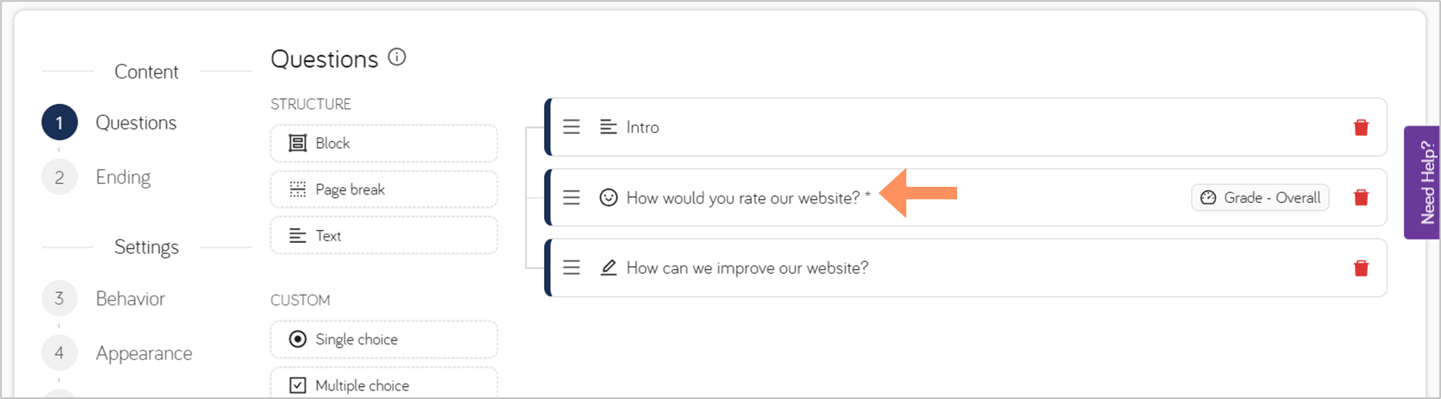
…and if the question requires an answer to be able to submit the responses (however, Extellio collects all answers, regardless of whether the respondents answered all questions or left halfway through). If the question is followed by an asterisk, it’s a required question.
You can also see if the question is a follow-up to a previous question, which is explained more further down.

Now that you understand this view better, it’s time to create a new question. To do that, you select the question type from the menu on the left, and then click and drag that question type to the survey. In this example, a single choice question.

When you add a new question to your survey, the edit modal automatically opens. Here you write the question (for example “What are you mainly looking for on our website today?”) and a description of question if needed. This is usually not necessary, but is an option if you feel the question needs more explaining but don’t want a longer question. For example, we use it for rating questions, to explain what is meant by “navigation” and so on. The description will appear between the question and the answer, in a lighter color, see example below.

The eye icon to the right of the question determines its visibility. Here you can activate and deactivate questions from a survey without having to remove them (you are also not able to remove questions that have collected data, but you are able to create new versions of the survey without these questions – read more here).

For single and multiple choice questions, you also need to add options. In the box “Add a new option”, write the option you want and press Enter. You can change the order of the options after you have added them, by clicking on the three lines and then dragging the option to its new location.

You don’t need to worry too much about the order, but if you have the option “Other” or “Don’t know” etc, it should always be placed last.
Next, decide of you want the question to be required. Questions that shouldn't be required are text answers and personal questions. Text answers are more time consuming, and personal questions can feel intrusive. Both are reasons to leave the survey. By not making those questions required, the likelihood of the respondents staying is higher.

There is also the choice to shuffle the order, which means that the order of the options will be random every time the survey is answered. This should never be used for options in a scale, such as 1-5 or good-bad. If you have options such as “Other” or “Don’t know”, you can choose to not shuffle the last option, which means that “Other” or “Don’t know” will always be last in the list.

If you have chosen a single choice question, as we did in this example, but found that you’d rather have a multiple choice question, you have the option to change the question type here. You can also change to a rating question, which means that you are able to add values to the option, which can then be calculated to rating scores etc.

For rating questions (a version of a single choice question), the value and the option does not have to be the same. Instead, you can have text options, which are translated into numbers (their values) for the calculation of the score.

For the benchmarks, you are not able to add these to questions yourself. That is to make sure customers don’t accidentally add the wrong question to a benchmark and affect the results. If you create a new question and want it to be added to a benchmark, send an email to customersuccess@extellio.com and we will help you.

The last question setting is display rules. This setting is used for follow-up, or dependent, questions. If a question doesn’t have display rules, it is shown to all respondents. If it has display rules, the question is only asked to the respondents that fulfill the requirements. For example, if you have the option “Other” to a question, you may want to know what “Other” entails. You can then add a follow-up question for the respondents who answered “Other”, and only they will be asked this question.

If you have several questions that you only want to ask a certain role or visitors with a certain purpose, etc, you are also able to add display rules to a block, which you can read more about here.
When all the settings are in place, click on save and the question is added to your survey.
If you want to move the question to a different place in the order, click on the three lines and drag the question to its new place.

You also have the option to delete questions and other elements, such as blocks and page breaks etc, from the survey. However, you are only able to delete questions that has no data connected to it (if you still want to remove the question, you can hide it instead – see above).
Also, when you delete a block, you will delete all the questions that are connected to that block too. If you only want to remove the block, first disconnect the questions (click on the three lines and drag the question to the left) and then delete the block.

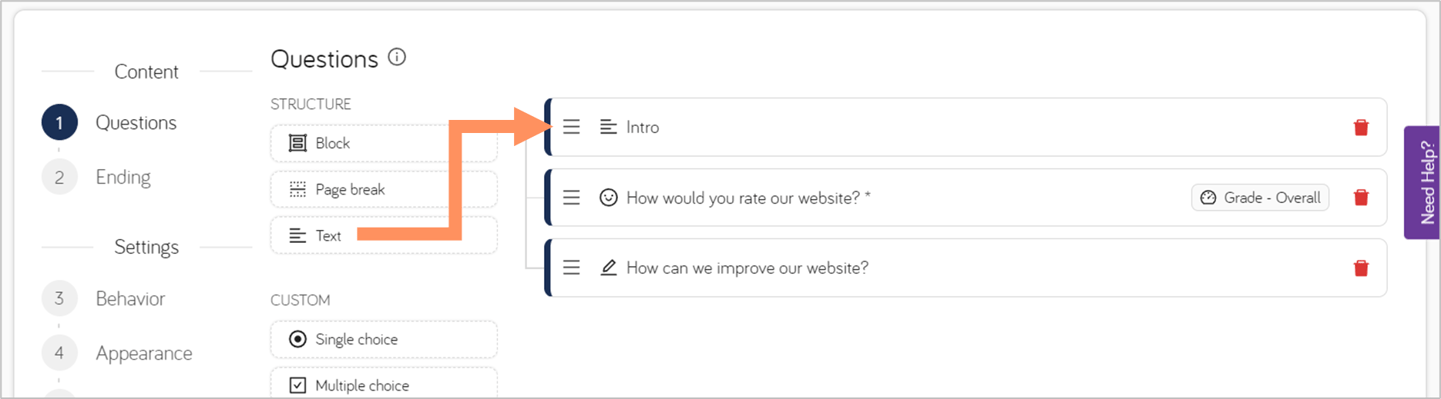
For feedback surveys, you may also like to add a short introduction. Do so by adding “Text” at the top of the survey.
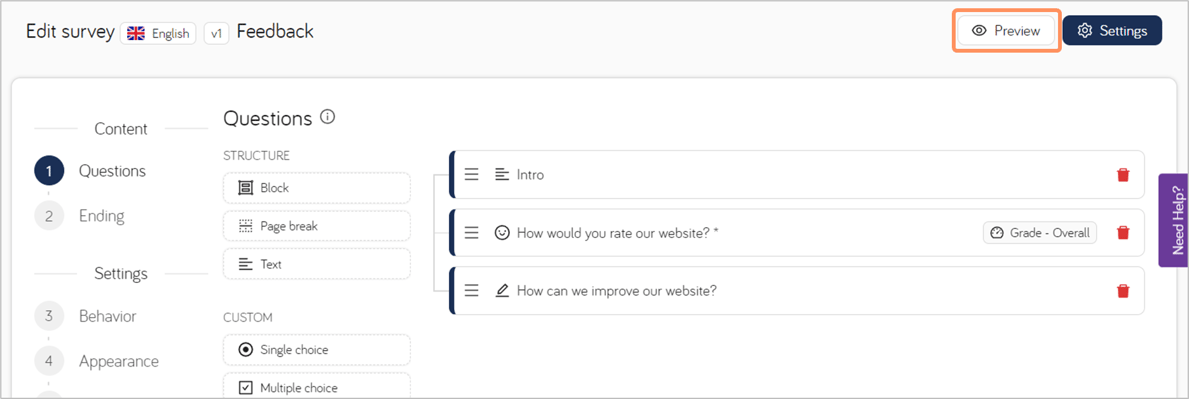
If you want to preview your survey at this stage, you can do so with the preview button.
To change the survey's name or industry, click on the "Settings" button.

Once you are done with the content, it’s time for the next step.
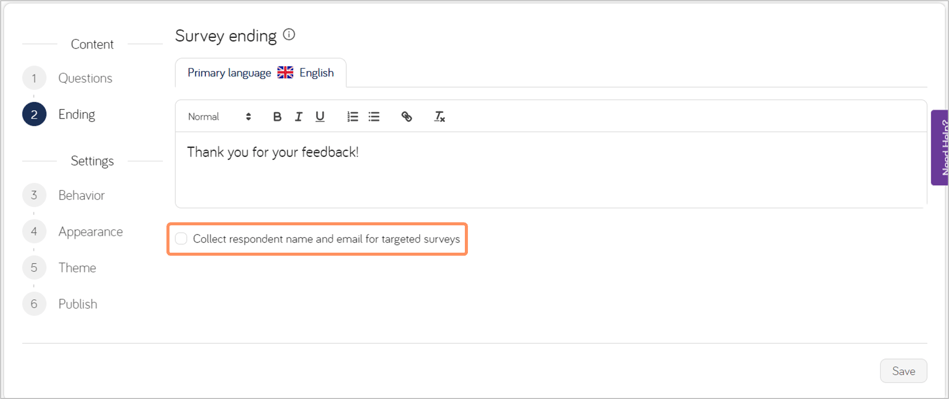
Step 2: Ending
The end text is most commonly used to thank the participants. Again, there is a default text, but you can write whatever you want.
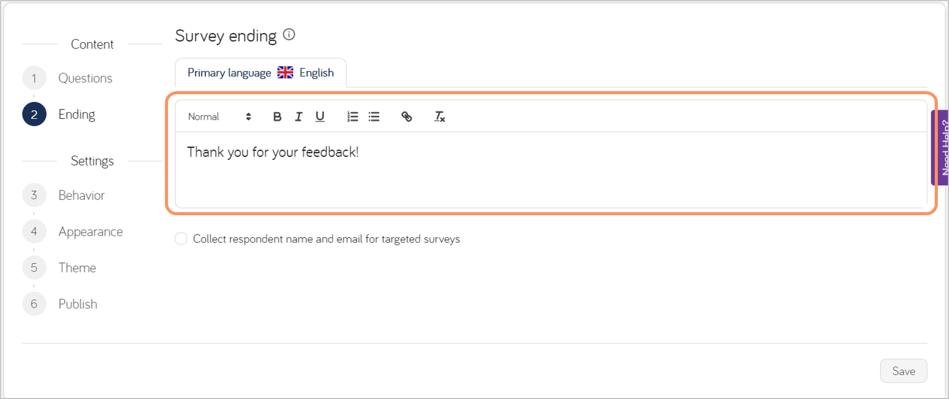
Here, you also have to option of recruiting a client panel. If you want to know more about client panels, you can check out this article.
Save your changes before moving on.
Step 3: Survey behavior
The survey behaviors determine how and when the survey is triggered. The settings are divided based on device, but don’t necessarily have to be different. To change the settings, start by changing from “Default settings” to “Custom settings”. You also have the option of copying the settings from a different device, as well as disabling the survey from one or more of the devices.

Once you have selected “Custom settings”, you are able to adapt the parameters.
The portion determines how many of the respondents that fulfill the requirements of triggering the survey will trigger it. The default is 100%, and unless you know you have a lot of traffic on your website, we recommend that you start with 100% and reduce if you find it necessary. We have an article about how many responses you need which can help you with that decision.

Next, you have two button choices: tab or floating. See the image below for comparison.

For both tab and floating button, you can choose position.

For tab, you give the button a label…

…and for floating, you select an icon.

With the trigger settings sorted, it’s time for the next step.
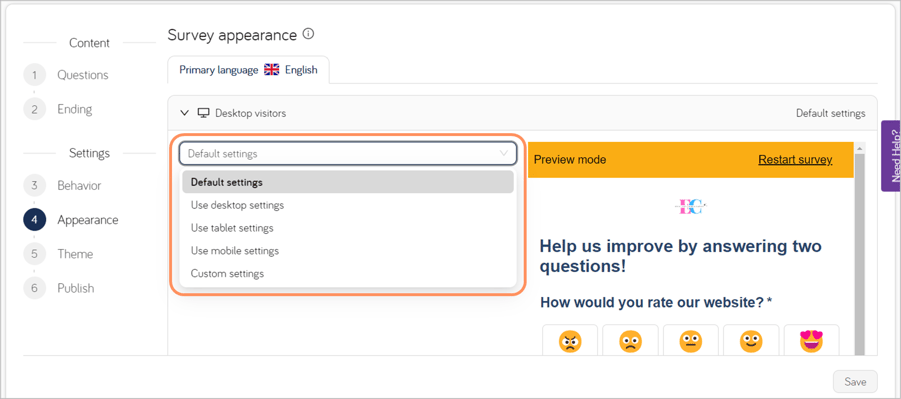
Step 4: Appearance
These settings determine the look of the survey, but not colors as that is the next step. The logic is the same as for the previous step, to change from the default settings, you choose “Custom settings” or which device to copy.
For the presentation mode, “Pages” is the default, where all questions will be on the same page unless you are using page breaks. “Quiz” will be one question per page, regardless of page breaks. Quiz mode is more suitable for questions with few questions, but for feedback surveys with only a couple of questions, it may be better to show all the questions up front.

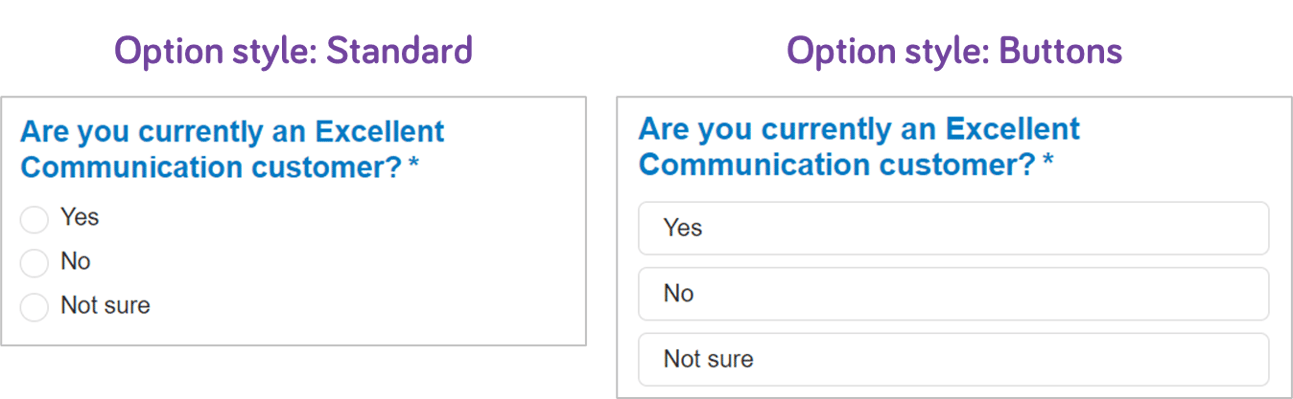
There is also a setting for the appearance of the questions’ options. They can be either “Standard” or “Button”. See image below for difference.
If you have more than 1 page for your survey (not likely for a feedback survey), you can add a progress bar to help the respondents get an understanding of how long the survey is.

Lastly, there is the logo. If you have added a logo to your account settings, it will automatically appear here, but you can also change to a different logo. Regardless of which logo, you can adapt its size. Or opt to exclude a logo.

With that, there are only two more steps left.
Step 5: Theme
This step allows you to change the colors of your survey. There are two ready options to choose between, “Default” and “Dark”, but there is also the option to choose “Custom” colors.

To change a color, click on the color box, and then select a color from the color picker or use a color code. The preview to the right will show all the changes automatically.

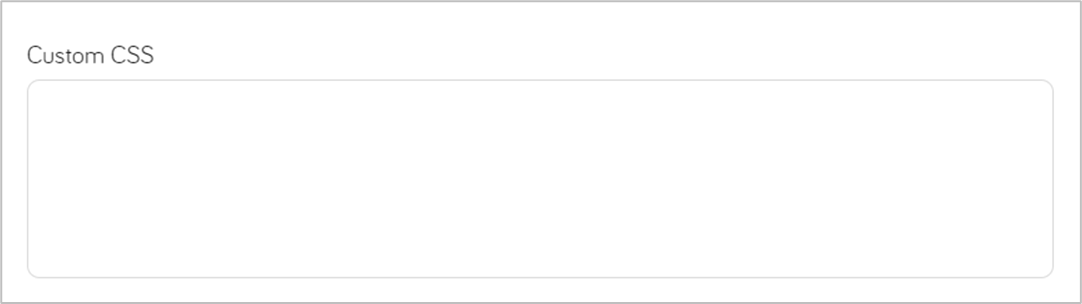
For more advanced settings, there is the option to add custom CSS. Read more here.
However, it requires the correct combination of license and user permissions.
And we’re down to just one more step.
Step 6: Publish
In the last step of the survey editor, you select when and where to publish the survey. First up is the start and end date. The survey needs a start date to be triggered, but it does not need an end date. You only need to add the end date when you want to pause or end the survey.
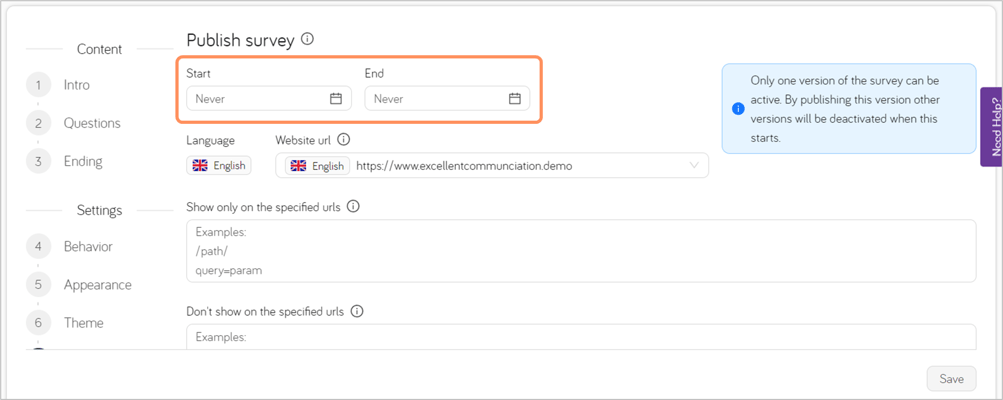
You select on which website you want to publish the survey, and for now, you probably only have one option.
For feedback surveys, you selected the pages where you want the survey to be triggered. For example, you may want to ask a couple of questions after the visitors have placed an order, so you add the survey to the confirmation page.

However, if needed, you can also exclude pages.

There are also some more advanced trigger options available, which you can read more about here. 
Lastly, you can exclude IP addresses, for example if you don’t want your company’s employees to answer the survey.

And your survey is done! As you can see, there is the option to preview the survey here too, which might be a good idea before publishing it. If you’re satisfied, add the start date and save.
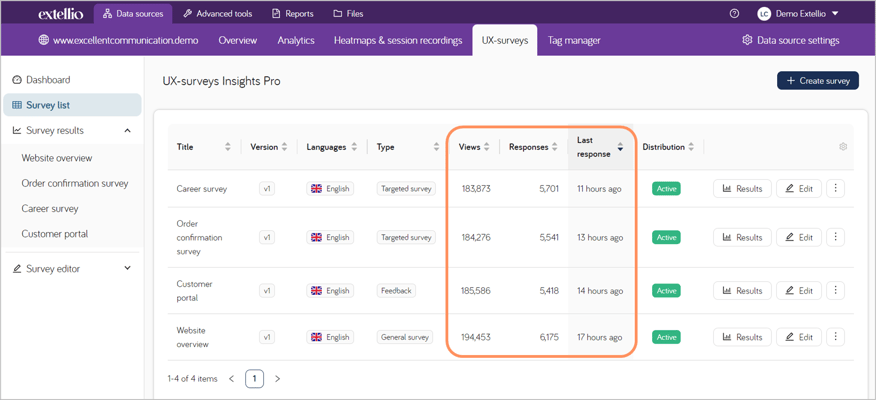
Survey overview
Once you have at least one survey, “Survey list” will give you an overview of your surveys. You can see how many have viewed it (been asked to participate), how many responses (actually participated), and when the last response was.
Apart from viewing the results and returning to the editor, if you click on the three dots, you are also able to again preview the survey, rename the survey, add translations and new versions.
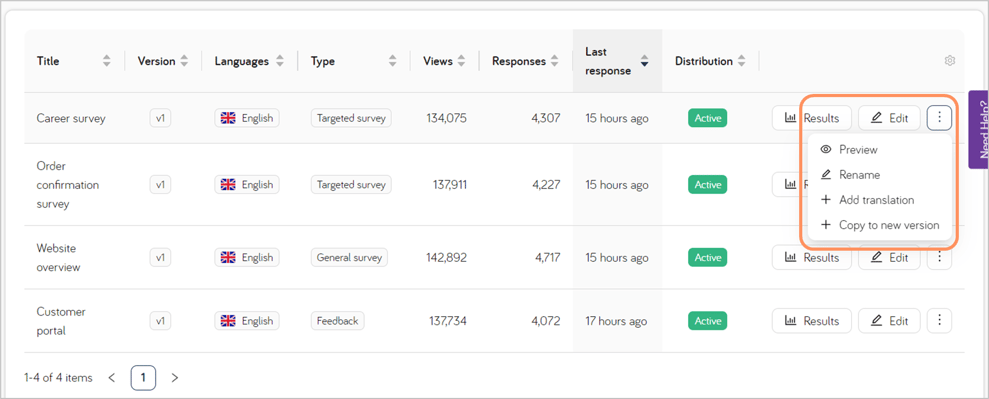
You can also add translations of the survey, if you want it in more than one language. So, let’s move on to translations.
